MongoDB Shell: Creating a MongoDB Database on Ubuntu - 2023
A Step-by-Step Tutorial with the command-line-interface


Table of contents
- What is MongoDB Shell ?
- Let's get started 👊
- Our Exhilarating Journey 🌍
- 👣 Step 1: Starting the MongoDB Service
- 👣 Step 2: Accessing the MongoDB Shell
- 👣 Step 3: Looking for existing Databases
- 👣 Step 4: Creating a new database
- 👣 Step 5: Inserting data into the database
- Managing collections in MongoDB
- Conclusion 📢
As an Ubuntu user and command line-savvy developer, you understand the significance of a scalable and efficient database for your applications.
For Ubuntu applications, it's crucial to have a dependable database solution that doesn't strain system resources or require constant switching between GUI applications. If you prefer working conveniently on the terminal with command-line tools, MongoDB Shell is the perfect choice.
In this guide, we'll walk you through the process of creating a MongoDB database on Ubuntu using MongoDB Shell. We'll explore the features of MongoDB Shell, from installation to database creation, data insertion, executing queries, and managing collections.
By the end, you'll have a solid understanding of how MongoDB Shell enhances your development workflow on Ubuntu, allowing scalable and efficient MongoDB interaction from your terminal.
What is MongoDB Shell ?
MongoDB Shell is the command-line interface for interacting with MongoDB, a popular NoSQL database. This lightweight tool provides you with direct access to MongoDB's features and functionality, allowing you to perform advanced operations, write scripts, automate tasks, and execute complex queries using the MongoDB Query Language (MQL), right from your Ubuntu terminal.
Let's get started 👊
Before getting started, make sure you have the following prerequisites in place:
A Linux-based operating system, specifically Ubuntu 22.04.2 LTS or a newer version, is recommended.
MongoDB installation: Ensure MongoDB is installed on your system to perform any MongoDB-related operations.
MongoDB shell: The MongoDB shell provides a powerful command-line interface for performing database operations, including commonly used CRUD (Create, Retrieve, Update, Delete) operations.
If you haven't already installed these powerful tools, don't worry!
Here is an exciting video tutorial, guiding you through the installation process of MongoDB and MongoDB Shell.
If you've already conquered the installation process, it's time to embark on a thrilling journey where we unravel what MongoDB has to offer.
Our Exhilarating Journey 🌍
😱 Avast, me hearty! Heed this warning:
📌 make sure ye don't miss a single step on this grand adventure. Keep yer wits sharp and remember, ❌ marks the spot on the map 🗺️.
Set sail 🚢 and navigate with care,🧭for the secrets of the database await ye! ⚓
👣 Step 1: Starting the MongoDB Service
To unveil the status of the MongoDB service and ensure its visibility, open the terminal using this comand on your keyboard - Ctrl+Alt+T, and inspect its current state.
In the terminal, type the following:
$ sudo systemctl status mongod

The output of the command reveals that the MongoDB service is currently inactive. To revive the MongoDB shell, terminate the ongoing process by using Ctrl + C command on your keyboard.
Type this command 👇 to start the MongoDB shell:
$ sudo systemctl start mongod
To verify the status of the MongoDB service once more, type the following 👇 in your terminal:
$ sudo systemctl status mongod.
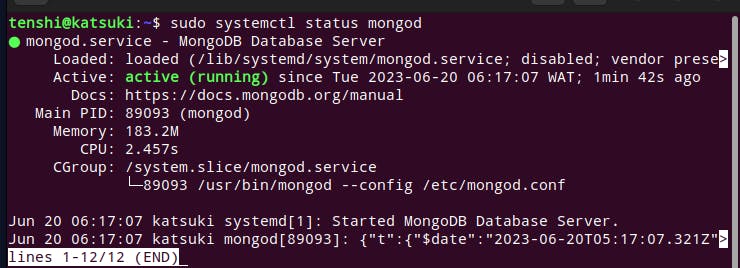
The output of the executed command shows that the MongoDB service is active and running.
👣 Step 2: Accessing the MongoDB Shell
With the MongoDB service active, you can interact with the database through the MongoDB Shell.
To gain access to the MongoDB Shell, type this 👇 in your Ubuntu terminal:
$ mongosh
This will connect to the default MongoDB server running on your local machine.
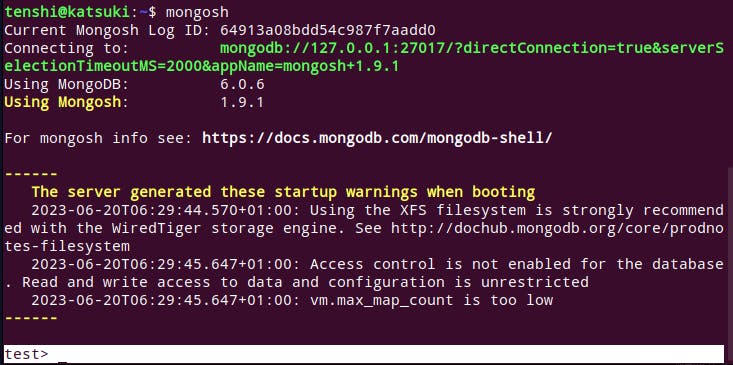
The prompt test> is a spot within the shell where you can input your MongoDB commands.
👣 Step 3: Looking for existing Databases
Now that you've successfully accessed the Mongo shell, it's time to check for available databases residing on your MongoDB server. You can accomplish this with the following command 👇:
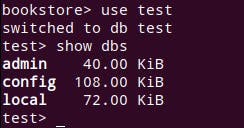
show dbs
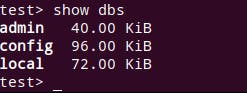
The output displays three pre-existing databases that are already present on your MongoDB server. These built-in databases are part of the default setup.
👣 Step 4: Creating a new database
To create a database using the MongoDB shell, type the following command 👇:
use [database_name]
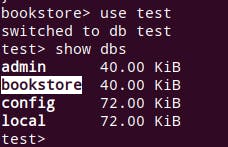
For this case, let's name our database bookstore. Simply execute the command :
use bookstore
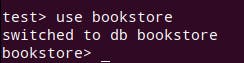
Executing this command allows you to switch to the created database and make it the active one, granting you the ability to perform operations and store data within the selected database.
Now that we have successfully created our database, let us proceed to check if it can be found among the existing databases.
On observation, you would notice our database does not currently exist since we have only created an empty shell of it. The database will only be displayed when it contains data.
This takes us to the next step...🛤
👣 Step 5: Inserting data into the database
To activate and prepare our previously created database for use, we must begin by creating a collection, which allows you to store and manage documents in that collection.
In MongoDB, a collection serves as a container for MongoDB documents, similar to a table in a relational database. To further simplify the concept of collections and documents, consider the analogy of a folder and a file.
In this analogy, the folder represents the collection, while the file is the document. Just as a file is stored within a folder, documents are stored within a collection.
Syntax 👇:
db.createCollection('name of the collection')
db: refers to the currently selected database in the MongoDB shell.createCollection(): This is a method provided by MongoDB to create a new collection.name of the collection: You need to replace this placeholder with the desired name for the collection you want to create. The name should be enclosed in single quotes (' ') to denote a string value.
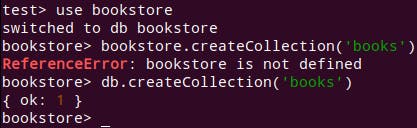
Kindly pay attention to the **ReferenceError!**⛔. To create the collection 'books', please use db.createCollection('books') instead of the bookstore.createCollection('books'). This will ensure the correct reference and avoid any errors.
Having successfully created our collection, it's time to insert our data.
To accomplish this, utilize the following syntax 👇:
db.collection.insertOne({}).
db: refers to the currently selected database in the MongoDB shell.collection: It represents the name of the collection where you want to insert the data.insertOne({}): is a MongoDB method used to insert a document into the designated collection. The empty curly braces{}represent an empty document, which you can replace with the desired data to be inserted. The data should be formatted in JSON.
Note: Before proceeding with the command, it is crucial to confirm that the correct database has been selected.
Please take note of:
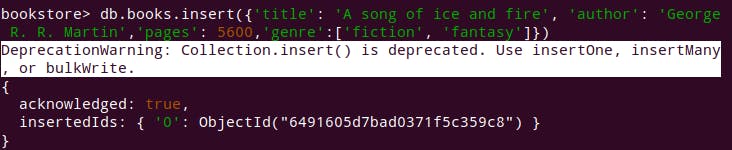
The Deprecation Warning ⛔. It is recommended to use
.insertOne({})instead of.insert({})for proper functionality and to avoid any deprecated features.Successful execution provides a message which includes an auto-generated ID for the inserted data.
Finally, to confirm the addition of "bookstore" to the list of databases, run the command show dbs in the Mongo shell.
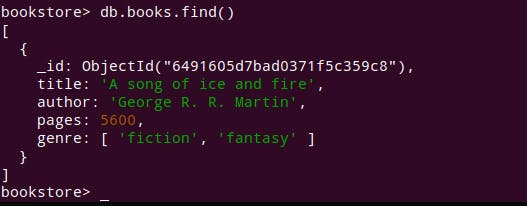
❌ marks the spot: To access your data use:
db.books.find()
Managing collections in MongoDB
In addition to the previously covered operations of creating and listing collections, MongoDB offers a wide range of additional functionalities for managing collections effectively. These include:
Dropping a Collection: Removing a collection from the database.
db.collection.drop()Example: Let's say you want to drop the "books" from the current database. The command would be:
db.books.drop()Important: The
.drop()method permanently deletes the entire collection and its data. Make sure you have a backup or are absolutely certain before using this command.Renaming a Collection: Modifying the name of an existing collection.
db.collection.renameCollection(newName, dropTarget)newName(string): Specify the new name for the collection, including the database name if the collection will be moved to a different database.dropTarget(boolean, optional): By default, thedropTargetparameter is set tofalse, meaning that if a collection with thenewNamealready exists, an error will occur. However, if you want to totally drop an existing collection with the samenewName, you can setdropTargettotrue.
Example: Let's say you want to rename the ''books'' collection to ''stories'' in the current database. The command would be:
db.books.renameCollection("stories")
To move a collection to a different database, such as changing "bookstore" to "storybooks", simply specify the new name along with the target database name, like this:
db.books.renameCollection("storybooks.stories")
Please note that the .renameCollection() operation is available starting from MongoDB version 4.2.
For more detailed information on the available collection management options and their usage, please consult the MongoDB Shell documentation.
Conclusion 📢
Creating a MongoDB database on Ubuntu can be accomplished using the MongoDB Shell. While there are alternative methods available, such as utilizing MongoDB Compass or the MongoDB Atlas UI, accessing the database through the MongoDB Shell offers an efficient approach, providing a powerful, flexible, and convenient way to interact with and manage MongoDB databases on the Ubuntu platform.
Resources 🎁
I share my blog posts on Twitter. Be sure to give me a follow 💜 so you don't miss out!